Wireless Android Auto on Raspberry Pi: A Software Engineer's Guide
nisargjhaveri/WirelessAndroidAutoDongle
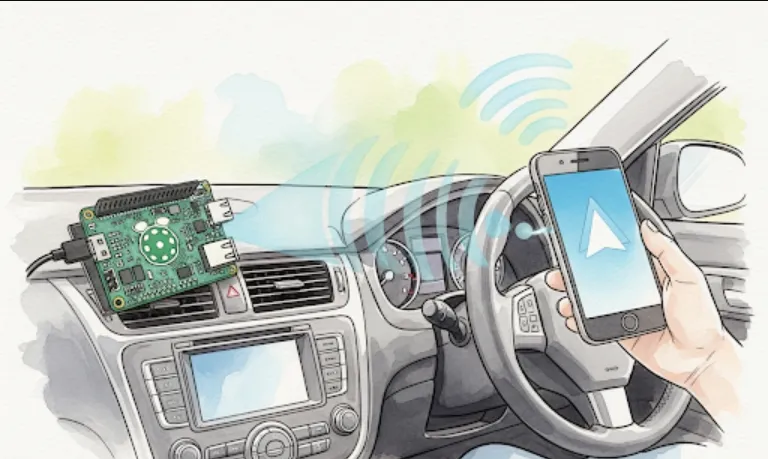
At its core, this project allows you to bring the convenience of wireless Android Auto to cars that only support wired Android Auto. It achieves this by using a Raspberry Pi as an intermediary device.
Imagine this
your car has Android Auto, but every time you get in, you have to plug in your phone with a cable. A bit of a hassle, right? This project turns your Raspberry Pi into a "dongle" that connects to your car via USB (mimicking a wired Android Auto connection) and then connects wirelessly to your phone. Presto! Wireless Android Auto.
This project offers a fantastic learning and application opportunity across several domains
Embedded Systems & Linux Kernel Hacking
Deep Dive into USB Gadget Mode
You'll learn how to configure the Raspberry Pi to act as a USB peripheral (specifically, an Android Auto head unit). This involves understanding Linux kernel modules like g_ether or custom gadget drivers.
Network Bridging
The project likely involves setting up network bridges between the Wi-Fi interface (for your phone) and the USB interface (for the car). This is a fundamental networking concept.
Resource Constrained Environments
Raspberry Pi is powerful, but it's still an embedded system. You'll learn to optimize software for such environments.
Android Development & Automotive
Android Auto Protocol Understanding
While you might not be directly implementing the Android Auto protocol from scratch, you'll gain practical insight into how it communicates between the phone and the head unit. This is invaluable if you ever work on Android Automotive OS or custom head unit solutions.
Debugging Android Connectivity
You'll encounter and solve problems related to USB connectivity, Wi-Fi, and potentially even network performance, all within the context of Android's ecosystem.
Open-Source Contribution
This is a great project to fork, modify, and contribute back to. You can add new features, improve stability, or optimize performance.
Reverse Engineering & Interoperability
Understanding Proprietary Protocols
Android Auto is a proprietary protocol. By observing and interacting with it, you implicitly learn about how Google designed its inter-device communication.
Bridging Technologies
This project is a prime example of bridging two different technologies (wired USB and wireless Wi-Fi) to achieve a desired outcome. This skill is transferable to many other integration challenges.
Practical Problem Solving & DevOps (for your home lab!)
Automated Deployment
You can script the setup process for the Raspberry Pi, learning about shell scripting, systemd services, and potentially even configuration management tools like Ansible for a fleet of Pis (just kidding, maybe for one!).
Troubleshooting Hardware/Software Interactions
You'll face real-world challenges where hardware (Raspberry Pi, USB cables, Wi-Fi dongles) and software (Linux, Android) interact. This hones your debugging skills.
The nisargjhaveri/WirelessAndroidAutoDongle project's GitHub repository is usually the best and most up-to-date source for installation instructions. However, I can give you a general outline of the steps involved.
Prerequisites
Raspberry Pi
A Raspberry Pi 3B+ or 4 is usually recommended due to better Wi-Fi and USB 3.0 capabilities.
MicroSD Card
At least 8GB, preferably a faster one (Class 10 or higher).
Power Supply
A good quality USB-C (for Pi 4) or Micro USB (for Pi 3B+) power supply.
USB-A to USB-C/Micro USB Cable
To connect the Pi to your car's Android Auto USB port.
Internet Access
For downloading software.
Basic Linux Command Line Knowledge
You'll be using SSH and terminal commands.
General Steps (Simplified)
Flash Raspberry Pi OS (formerly Raspbian) Lite
Download the Raspberry Pi Imager tool.
Choose "Raspberry Pi OS Lite (64-bit)" for your Pi model (no desktop environment needed).
Select your MicroSD card and flash the OS.
Enable SSH & Connect to Wi-Fi (Headless Setup)
Before ejecting the SD card, create an empty file named ssh (no extension) in the boot partition to enable SSH.
To set up Wi-Fi, create a file named wpa_supplicant.conf in the boot partition with your Wi-Fi credentials
country=US # Or your country code
ctrl_interface=DIR=/var/run/wpa_supplicant GROUP=netdev
update_config=1

network={
    ssid="YOUR_WIFI_NETWORK_NAME"
    psk="YOUR_WIFI_PASSWORD"
}
Insert the SD card into your Pi and power it on.
Find your Pi's IP address (e.g., using nmap or checking your router's connected devices).
SSH into your Pi
ssh pi@YOUR_PI_IP_ADDRESS (default password is raspberry).
Update and Install Dependencies
sudo apt update
sudo apt upgrade -y
Install necessary packages. The GitHub repo will list these, but they often include things like git, python3, dnsmasq, hostapd, etc.
Clone the Repository
git clone https://github.com/nisargjhaveri/WirelessAndroidAutoDongle.git
cd WirelessAndroidAutoDongle
Run the Setup Script
The project usually has a setup script (e.g., setup.sh or a Python script).
sudo ./setup.sh (or sudo python3 setup.py). This script will configure networking, install required services, and set up the USB gadget mode. Pay close attention to any prompts or specific instructions in the project's README during this step.
Reboot
sudo reboot
Connect to your Car
Once the Pi reboots, connect the USB-A end of your cable to your car's Android Auto USB port and the other end (USB-C or Micro USB) to your Raspberry Pi's data USB port (not the power port).
Your car should detect the Pi as an Android Auto device.
On your phone, connect to the Wi-Fi network broadcast by the Raspberry Pi (it will likely have a name like "AndroidAutoDongle" or similar).
Android Auto should then wirelessly connect!
The actual "magic" of this project lies in sophisticated shell scripting, Python scripts, and Linux kernel configurations, rather than a single block of application-level Python code. However, let's look at a conceptual example of how a part of it might work, focusing on the USB gadget mode setup and a simplified Wi-Fi access point.
Conceptual Python Script Snippet (for setting up network interfaces and services)
import subprocess
import os

def run_command(command):
    """Helper to run shell commands and check for errors."""
    try:
        subprocess.run(command, check=True, shell=True)
        print(f"Successfully ran: {command}")
    except subprocess.CalledProcessError as e:
        print(f"Error running command: {command}\n{e}")
        exit(1)

def configure_usb_gadget():
    """
    Configures the Raspberry Pi's USB port to act as an RNDIS (Ethernet over USB) device.
    This makes the car think it's talking to a network adapter.
    """
    print("Configuring USB Gadget mode...")
    # Load the USB gadget module (g_ether for network over USB)
    run_command("sudo modprobe libcomposite")
    run_command("sudo modprobe g_ether")

    # This is highly simplified. Real setup involves creating /sys/kernel/config/usb_gadget tree.
    # A real script would dynamically create directories and symlinks here.
    # For demonstration, let's assume a pre-configured configfs setup or direct module parameters.
    # Example (simplified, actual configfs is more verbose):
    # This might involve creating functions, configs, and associating them.
    # e.g., os.makedirs('/sys/kernel/config/usb_gadget/g1/functions/rndis.usb0')
    # os.symlink('/sys/kernel/config/usb_gadget/g1/functions/rndis.usb0', '/sys/kernel/config/usb_gadget/g1/configs/c.1/rndis.usb0')
    # echo "0x1d6b" > /sys/kernel/config/usb_gadget/g1/idVendor
    # echo "0x0104" > /sys/kernel/config/usb_gadget/g1/idProduct

    # After configuration, enable the gadget (connect it to a USB controller)
    # run_command("echo <CONTROLLER_NAME> > /sys/kernel/config/usb_gadget/g1/UDC")
    print("USB Gadget mode configured (requires specific configfs setup in full project).")

def setup_wifi_ap():
    """
    Sets up the Raspberry Pi's Wi-Fi as an Access Point (AP).
    Requires hostapd and dnsmasq.
    """
    print("Setting up Wi-Fi Access Point...")
    # Install hostapd and dnsmasq if not present (real script would check first)
    # run_command("sudo apt install -y hostapd dnsmasq")

    # Configure hostapd (simplified)
    # This would write to /etc/hostapd/hostapd.conf
    hostapd_conf = """
interface=wlan0
ssid=AndroidAutoDonglePi
hw_mode=g
channel=6
macaddr_acl=0
auth_algs=1
ignore_broadcast_ssid=0
wpa=2
wpa_passphrase=YourSecretPassword
wpa_key_mgmt=WPA-PSK
rsn_pairwise=CCMP
"""
    # with open("/etc/hostapd/hostapd.conf", "w") as f:
    #     f.write(hostapd_conf)
    # run_command("sudo systemctl unmask hostapd")
    # run_command("sudo systemctl enable hostapd")
    # run_command("sudo systemctl start hostapd")

    # Configure dnsmasq (for DHCP and DNS for connected clients)
    # This would write to /etc/dnsmasq.conf or a new config file
    dnsmasq_conf = """
interface=wlan0
dhcp-range=192.168.4.2,192.168.4.20,255.255.255.0,24h
dhcp-option=option:router,192.168.4.1
dhcp-authoritative
"""
    # with open("/etc/dnsmasq.d/01-pihotspot", "w") as f:
    #     f.write(dnsmasq_conf)
    # run_command("sudo systemctl enable dnsmasq")
    # run_command("sudo systemctl start dnsmasq")

    # Set static IP for wlan0
    # run_command("sudo ip address add 192.168.4.1/24 dev wlan0")

    print("Wi-Fi AP setup (requires hostapd/dnsmasq configuration).")


def setup_network_bridging():
    """
    Creates a network bridge between the USB gadget interface (usb0) and Wi-Fi interface (wlan0).
    """
    print("Setting up network bridge...")
    # This typically involves:
    # 1. Creating a bridge interface (e.g., 'br0')
    # 2. Adding wlan0 and usb0 to the bridge
    # 3. Configuring NAT/IP forwarding
    # run_command("sudo brctl addbr br0")
    # run_command("sudo brctl addif br0 wlan0")
    # run_command("sudo brctl addif br0 usb0") # usb0 is the name created by g_ether
    # run_command("sudo ip link set dev br0 up")
    # run_command("sudo sysctl -w net.ipv4.ip_forward=1")
    # run_command("sudo iptables -t nat -A POSTROUTING -o eth0 -j MASQUERADE") # If internet sharing is needed

    print("Network bridge configured (requires netplan or ifupdown config).")

if __name__ == "__main__":
    print("Starting Wireless Android Auto Dongle setup (conceptual)...")
    configure_usb_gadget()
    setup_wifi_ap()
    setup_network_bridging()
    print("Conceptual setup complete. Actual project uses more robust scripts and config files.")
Explanation of the Conceptual Code
run_command(command)
A utility function to execute shell commands from Python, which is common when automating system configurations.
configure_usb_gadget()
This is where the magic of pretending to be an Android Auto device happens. The Linux kernel's g_ether module (or similar) is used to make the Raspberry Pi appear as a USB Ethernet device to the car. The actual configuration involves creating a complex file hierarchy under /sys/kernel/config/usb_gadget/ to define the USB device's properties (Vendor ID, Product ID, functions like RNDIS, etc.).
setup_wifi_ap()
This function conceptually outlines how hostapd (Host Access Point Daemon) and dnsmasq are used.
hostapd turns the Raspberry Pi's Wi-Fi adapter into an actual Wi-Fi access point that your phone can connect to.
dnsmasq provides DHCP services (assigning IP addresses to connected devices) and DNS resolution within the Wi-Fi network.
setup_network_bridging()
This is crucial. It creates a "bridge" (like a virtual network switch) that connects the network interface created by the USB gadget (e.g., usb0) and the Wi-Fi access point interface (wlan0). This allows traffic from your phone (over Wi-Fi) to flow seamlessly to the car (over USB), and vice versa. IP forwarding and NAT (Network Address Translation) might also be set up for internet access if desired.